KNITTING PATTERNS
INSTRUCTIONS FOR MAKING SQUARES
Squares for Wraps are to measure 25cm x 25cm (10 inches x 10 inches).
Knitted Squares
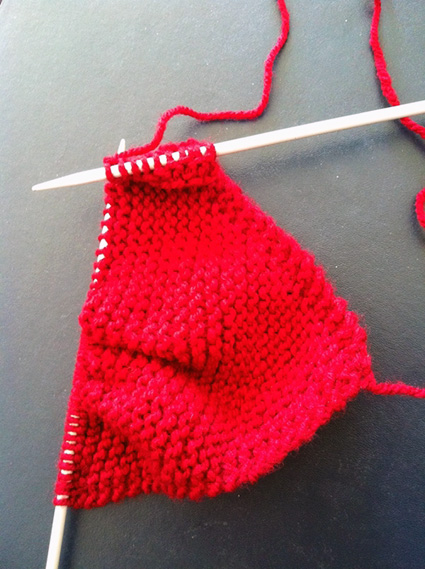
To knit a 25cm x 25cm square use No.8 (4mm) needles with 8 ply yarn, cast on 50-55 stitches, and knit each row plain (ie garter stitch).
Note
Test your tension to measure 10 inches.
Do Not Knit Stocking stitch
Do not knit one row plain, one row purl (ie stocking stitch) as your square will curl up.
No Knots
Start each ball of yarn at the beginning of a row and sew in ends. Do not cut ends off short as your square will unravel. When starting or finishing a square, sew in all ends.
Crochet squares
Crochet squares to measure 25cm x 25 cm as for knitted squares – any pattern will do. Some people crochet the whole Wrap in one piece.
COMPLETED WRAPS ARE PREFERRED
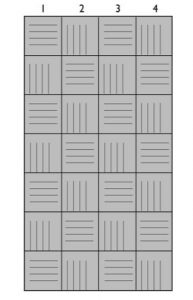
They are made up of 28 squares as per diagram.
Across: 4 squares = 100cm (40 inches).
Down: 7 squares = 175 cm (70 inches).
Please keep joins on the same side and flat and alternate the squares vertically and then horizontally.The squares can also be joined using a crochet stitch and finished with a crochet edge. (Optional).
Wraps can be knitted, woven or patchwork lined to finish at approximately 100 cm x 175 cm (40 inches x 70inches).
INSTRUCTIONS FOR DIAGONAL SQUARES
- Cast on 3 stitches.
- Row 1: K1, increase 1 in next stitch, knit to end of row.
- Repeat Row 1 until side edge measures 10 inches (25 cm).
- Next Row: K1, K2 together, knit to end of row.
Repeat this row until 3 stitches remain, cast off.
In some instances you may have to decrease 2 stitches per row (beginning and end) towards the last 3 inches of the square due to the tension of various yarns. This will ensure a perfect 25cm square.

FUN AND ADVANCED PATTERN IDEA
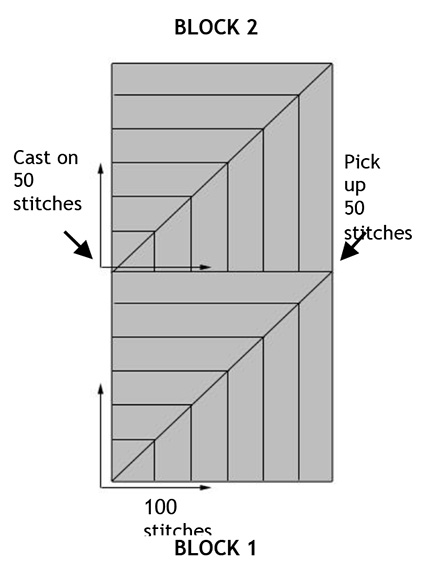
Try it. It’s easier than it looks. It cuts down on ‘sewing up’ time as 4 or 7 squares can be knitted in one strip.
Block 1, cast on 100 stitches
Row 1: k48, k2 tog. Using a contrasting colour tie a marker around the needle. Knit to the end of row.
Row 2: Knit to 2 stitches BEFORE the marker, k2 tog. Slip marker, knit to end of row.
Repeat row 2 until there are 4 sts left, dropping the marker on the last row.
Next row: k1, k2 tog, k1 Next row: k1, k2 together.
Final row: k2 together, do not break off thread.
To begin Block 2, pick up 50 stitches along the top edge of Block 1.
Turn knitting around and then continue by casting on (using the two needle cast-on method) a further 50 stitches (100 stitches).
Repeat rows as for Block 1.
Make columns of 4 or 7 blocks and sew columns together.
Or, alternatively, to avoid having to sew the columns up, using a completed column of 4 or 7 squares, begin 2nd column:
1st block cast on 50 stitches and then pick up 50 stitches along the right edge of the first square of the first column.
Knit a new square.
2nd block: pick up 50 stitches along the top edge of the square just completed and 50 stitches from the side of the 2nd square in the first column.
Knit a new square.
Continue with this process until all 28 squares have been completed.
Please be sure to sew in all loose ends.
GIFT FROM WRAP WITH LOVE AUSTRALIA
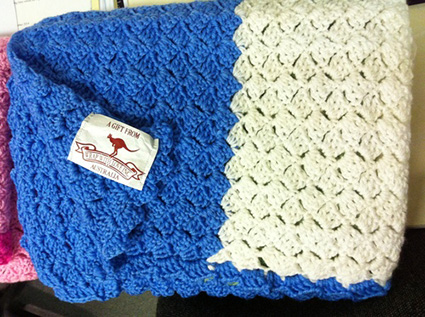
A ‘Gift from Wrap with Love Australia’ label has been printed and we ask that you attach one label to one underside corner of each Wrap.
Please email us or phone us on 02 8399 3000 for labels or ask your Area Contact.
In an attempt to save money on postage, we have been trialling sewing a label onto one square in each of the bags of squares that we send out for sewing up. And we have always sewn labels on at the warehouse, so feel free to send yours in without a label.
FEATURED PATTERNS FOR KNITTED SQUARES
JANE'S SQUARE KNITTING PATTERN
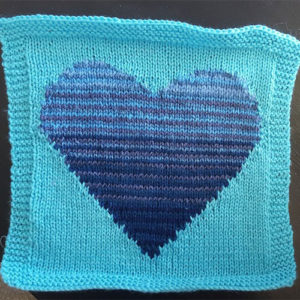
In memory of Jayne Goodes we created a heart pattern you can include in a wrap.
Cast on 55 stitches
Knit 6 rows Garter stitch
Swap to Stocking stitch maintaining a border of 5 stitches of Garter stitch, knit 6 rows
Follow the chart below to create the heart
Knit 6 rows to complete the square and cast off
KANGAROO SQUARE KNITTING PATTERN
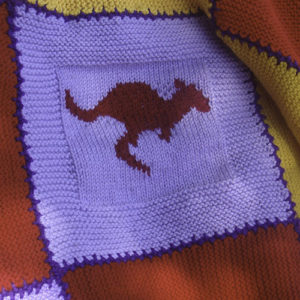
Knitters are invited to include one Kangaroo Square in each Wrap as a way of making our wraps uniquely Australian.
Please download the PDF below for the detailed knitting pattern.
PATTERNS FOR KNITTED SQUARES
BASKET WEAVE STITCH PATTERN
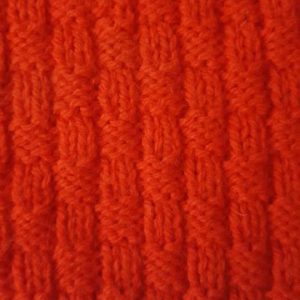
Multiple of 8 + 3
Row 1: Knit
Row 2: K4,P3 *K5, P3 rep from * to last 4 sts K4
Row 3: P4,K3 *P5, K3 rep from * to last 4 sts P4
Row 4: As 2nd Row
Row 5: Knit
Row 6: P3 *K5, P3 rep from * to end
Row 7: K3 *P5, K3 rep from * to end
Row 8: as Row 6
Repeat these 8 Rows
BASKET WEAVE 2 STITCH PATTERN
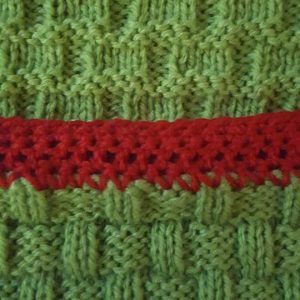
Multiple of 6 +4
Row 1: *K4 P2 rep from * to last 4 sts K4
Row 2: *P4 K2 rep from * to last 4 sts P4
repeat these 2 rows
Row 5: Purl
Row 6 : knit
Row 7: P3 * K4 P2 rep from * to last st P1
Row 8: K3 * P4 K2 rep from * to last st K1
Repeat last 2 rows once
Row 11: purl
Row 12: Knit
Repeat these 12 rows
BOX AND STRIPE STITCH PATTERN
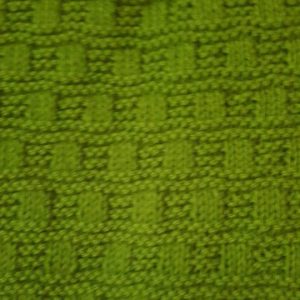
Multiple 0f 6 + 3
Work 5 Rows garter Stitch(1st row is right side)
6th Row: K3, *P3 K3 repet from * to end
7th Row: Knit
8th Row: as 6th Row
Work 5 rows garter stitch
14th Row: P3 *K3 P3 repeat from * to end
15th Row: Knit
16th Row: As 14th Row
Repeat these 16 Rows
BOX STITCH KNITTING PATTERN

Multiple of 4 + 2
Row 1: K2, *P2,K2 rep from * to end
Row 2: P2 *K2, P2 rep from * to end
Row 3: as 2nd Row
Row 4: as 1st Row
Repeat these 4 rows
CHEVRON RIB STITCH PATTERN
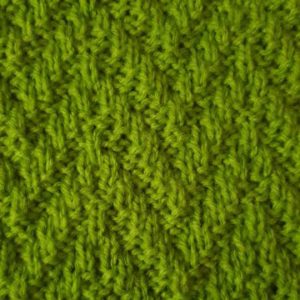
Multiple of 12 +1
Row 1: (right side): P2, K2, P2, K1, P2, K2 *P3, K2, P2, K1, P2, K2 rep from * to last 2 sts P2
Row 2: K2, P2, K2, P1, K2, P2 *K3, P2, K2, P1, K2, P2 rep from * to last 2 sts K2
Row 3: P1 * K2, P2, K3, P2, K2 ,P1 rep * to end
Row 4: k1 * P2, K2, P3, K2, P2, K1 rep from * to end
Row 5: as Row 2
Row 6: P2, K2, P2 ,K1, P2, K2 *P3, K2, P2, K1, P2, K2 rep from * to last two sts P2
Row 7: as row 4
Row 8: As row 3
Repeat these 8 Rows
DASH STITCH KNITTING PATTERN
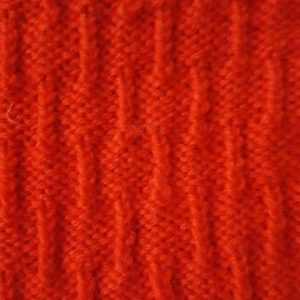
Multiple of 6 + 3
Row 1 (wrong Side): K4 * PB1, K5 Rep from * to last 5 sts PB1, K4
Row 2: P4 *KB1, P5 rep from * to last 5 sts KB1 P4
repeat these 2 rows twice
Row 7: K1 * PB1 P5 repeat from * to last 2 sts PB1 K1
Row *: P1 * KB1 K5 repeat from * to last 2 sts KB1 P1
Repeat these 2 rows twice More
Repeat these 12 rows
DIAMOND BROCADE STITCH PATTERN
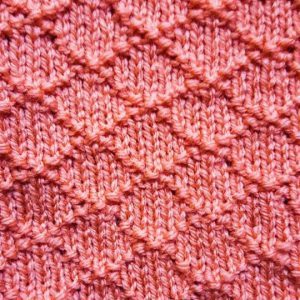
Multiple of 8 +1
Row 1; (Right side) K4 * P1, K7; Rep from * to last 5 sts, P1, K4
Row 2: P3 * K1, P1 K1,P5 rep from * to last 6 sts K1, P1, K1, P3
Row3: K2, *P1, K3, rep from * to last 3 sts P1, K2
Row 4: P1, *K1, P5, K1, P1, rep from * to last st k1
Row 5: *P1, K7 rep from * to last st P1
Row 6: as Row 4
Row 7: As Row 3
Row 8; As Row 2
Repeat these 8 Rows
DOT STITCH KNITTING PATTERN
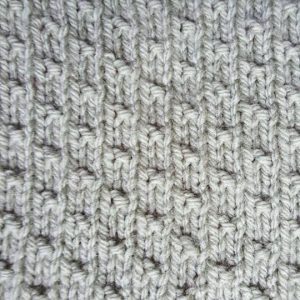
Multiple of 4 +3
Row 1:(right Side) K1 *P1, K3 Rep from * to last 2 sts P1 K1
Row 2: Purl
Row 3: * K3, P1 repeat from * to last 3 sts K3
Row 4: Purl
Repeat these 4 rows
DOUBLE MOSS STITCH PATTERN
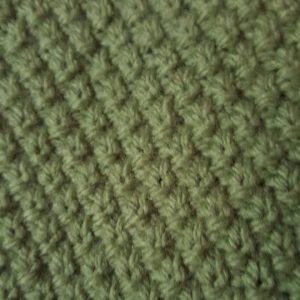
Multiple of 2 + 1
Row 1: K1 *P1, K1 Rep from * to end of row
Row 2: P1 *K1, P1 Rep from * to end of row
Row 3: as 2nd Row
Row 4 : as 1st Row
Repeat these 4 Rows
GRANITE RELIEF STITCH PATTERN
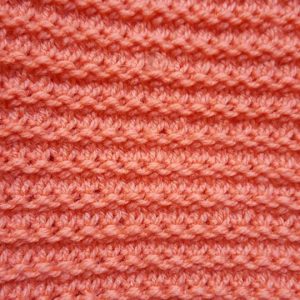
Multiple of 2
Row 1: Knit
Row 2: K1 * K2 tog across row to last stitch K1
Row 3: K1 K into front and back of each stitch to last stitch K1
Row 4: Purl
Repeat these 4 rows
INTERRUPTED RIB STITCH PATTERN
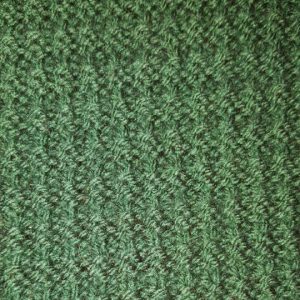
Multiple of 2 +1
Row 1 (right side): P1, *K1, P1 rep from * to end
Row 2: K1 *p1, K1 rep from * to end
Row 3: purl
Row 4: Knit
Repeat these 4 Rows
LATTICE STITCH KNITTING PATTERN
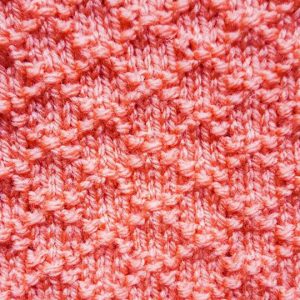
Similar to Diamond Brocade but smaller diamonds – Multiple or 6 + 1
Row 1: (right side) K3 *P1, K5 repeat from * to last 4 sts P1, K3
Row 2: P2, *K1, P1, K1, P3 repeat from * to last 5 sts, K1, P1, K1, P2
Row 3: K1, *P1, K3, P1, K1 rep from * to end of row
Row 4: K1 *P5, K1 repeat from * to end of row
Row 5: As Row 3
Row 6: As Row 2
Repeat these 6 rows
LITTLE ARROWS STITCH PATTERN
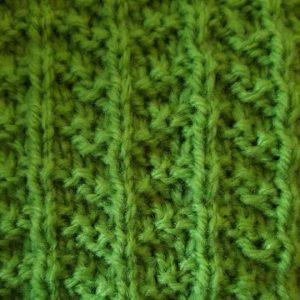
Mutiple of 8 Sts + 1
1st Row: (right side) K2, P2, K1, P2, *K3, P2, K1, P2 rep from * to last 2 sts K2
2nd Row: P3, K1, P1, K1,*P5, K1, P1, K1 repeat from* to last 3 sts P3
3rd Row: K1,*P1, K5, P1, K1 rep from * to end
4th Row: P1, *K2, P3, K2, P1 rep from * to end
Rep these 4 rows
LOOP STITCH KNITTING PATTERN
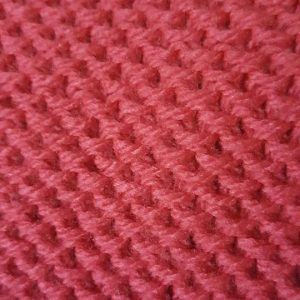
Multiple of 2 sts
Note: slip all sts purlwise
Row 1: (right side) Knit
Row 2:* K1 Sl1 rep from * to last st K1
Row 3: Knit
Row 4: K2 * Sl1 K1 rep from * to end
repeat these 4 rows
MOSS STITCH KNITTING PATTERN
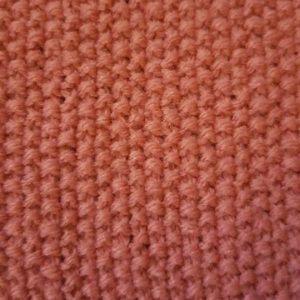
Multiple of 2+ 1
Row 1: K1 *p1 K1 repeat to end of row
Row 2: repeat row 1
Repeat these two rows
OBLONG TEXTURE STITCH PATTERN
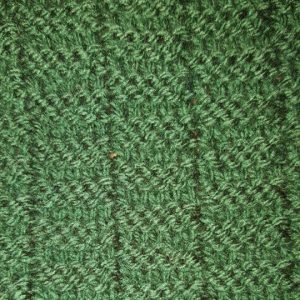
Multiple of 10sts +1
1st Row(right side) K3 P5 * K5 P5 rep from * to last 3 sts K3
2nd Row: P3 K5 *P5 K5; repeat from * to last 3 sts P3
3rd row: as 2nd Row
4th Row: as 1st Row
Repeat these 4 rows
RIDGED RIB STITCH KNITTING PATTERN
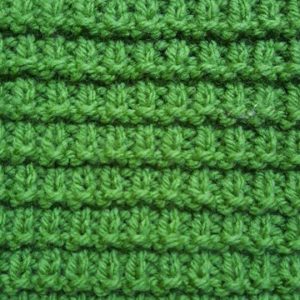
Multiple of 2 + 1
Rows 1 & 2: Knit
Row 3: (Right Side) P1 *K1, P1 rep from * to end of row
Row 4: K1 *P1 K1 rep from * to end of row
Repeat these 4 Rows
SEEDED TEXTURE STITCH PATTERN
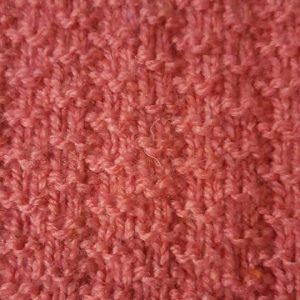
Multiple of 5sts +2
Row 1: (right side) K2 *P3, K2 rep from * to end
Row 2: Purl
Row 3: *P3 K2 rep to last two sts P2
Row 4: Purl
Rep these 4 Rows
SEET STITCH KNITTING PATTERN
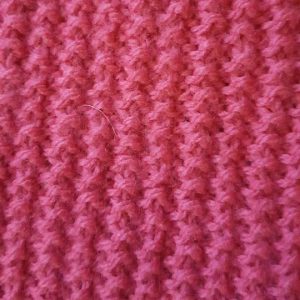
Mutiple of 4 + 3
1st Row: (right side) P1 K1 *P3 K1 repeat from * to last st P1
2nd Row: K3 *P1, K3 rep from * to end
Repeat these two rows.
NB: the “wrong side” of this stitch is also good!
SIX STITCH RIB KNITTING PATTERN
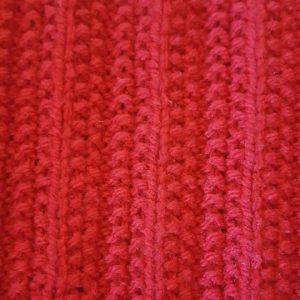
Mutiple of 6 +3
Row 1 : * K3 P3 rep from * to end
Row 2: * K1 P1 rep from * to end
Repeat these 2 rows
SPACE INVADERS STITCH PATTERN
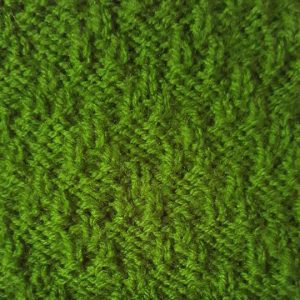
Multiple of 6 Sts + 3
Row 1 (rightside): K1, P1, K1 *P3, K1, P1, K1 rep from * to end
Row 2: P3, *K3, P3 rep from * to end
Row 3: P1, K1 *P5, K1 rep from * to last st P1
Row 4: K1, P1 *K5, P1 rep from * to last st K1
Row 5: P3, *K1, P1, K1, P3 rep from* to end
Row 6: K3, *P1, K1, P1, K3 rep from * to end
Row 7: P3, *K3, P3 rep from * to end
Row 8: K4, P1 *K5 P1 rep from * to last 4 sts K4
Row 9: P4 K1, *P5, K1 rep from * to last 4 sts P4
Row 10: P1, K1, P1, *K3, P1, K1, P1 rep from * to end
Repeat these 10 Rows
STRIPED GARTER STITCH PATTERN
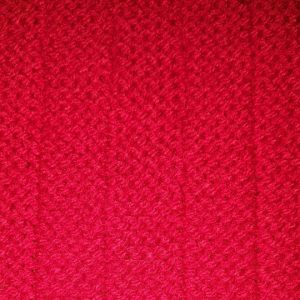
Muliple of 10 + 5
Row 1: K5 *P5 K5 rep to end
Row 2: as row 1
Repeat these 2 Rows
TEXTURED STRIPE STITCH PATTERN
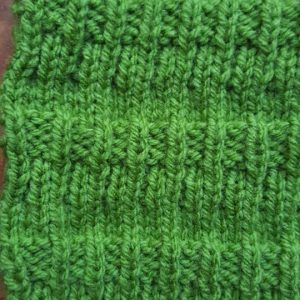
Multiple of 3 Stitches
Row 1: (right Side) Knit
Row 2: Purl
Repeat the last 2 rows once more
Row 5: K1 *P1, K2 rep from * to last 2 sts P1, K1
Row 6: P1,*K1, P2 rep from * to last 2 sts K1 P1
Repeat these 2 rows once
Row 9: P2, K1 rep to end
Row 10: K2, P1 rep to end
repeat these 2 rowws once
Repeat these 12 rows
TILE STITCH KNITTING PATTERN
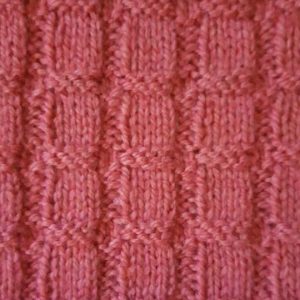
Multiple of 6 +4
Row 1: (right side) K4, *P2 K4 rep to end
Row 2: P4 *K2, P4 rep to end
Repeat lst 2 rows twice more
Row 7: as 2nd Row
Row 8: as 1st Row
Repeat the 8 Rows
WAFFLE STITCH KNITTING PATTERN
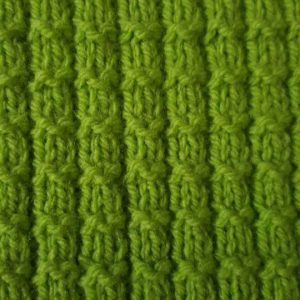
Multiple of 3+1
Row 1: (right side) P1 *K2, P1 rep from * to end
Row 2: K1 *P2, K1 rep from * to end
Row 3: as Row 1
Row 4: Knit
Rep these 4 Rows
WWL - RIDGED GARTER STITCH PATTERN
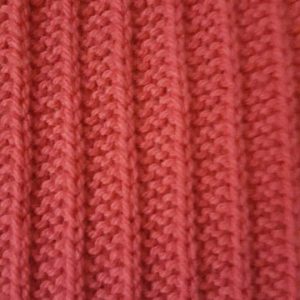
Mutiple of 4 +3
Row 1: (right side) Knit
Row 2: K3 * wool fwd Sl1 Pwise K3 rep from * to end
Repeat these two rows
PATTERNS FOR CROCHET SQUARES
CROCHET CORNER TO CORNER PATTERN
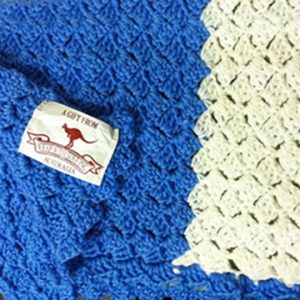
To Start: Chain 7:
Row 1: Treble into the 4 Ch from the hook, Tr into next
two Ch – 1 Block Made
Row 2: Chain 7, Tr into 4th Ch from hook and following two, slip st into ch3 space of previous block, Ch3 Tr3 into same space 2 Blocks made
Repeat Row 2: Adding a new block each row until you reach the desired length along the side of the square (ie 25cm)
Decrease by Sl st across the top of the block in place of ch 7 *Sl st 3ch 3 tr in each 3ch space of previous row repeat * to end
Repeat until last single block is formed
To change colour : Work last Tr before colour change until 2 loops are left on hook, drop colour in use, with next colour to be used draw through 2 loops on hook and continue with new colour
NB: this pattern can be used to make an entire wrap by forming the work into the desired size
For a Youtube Tutorial
GRANNY SQUARE PATTERN
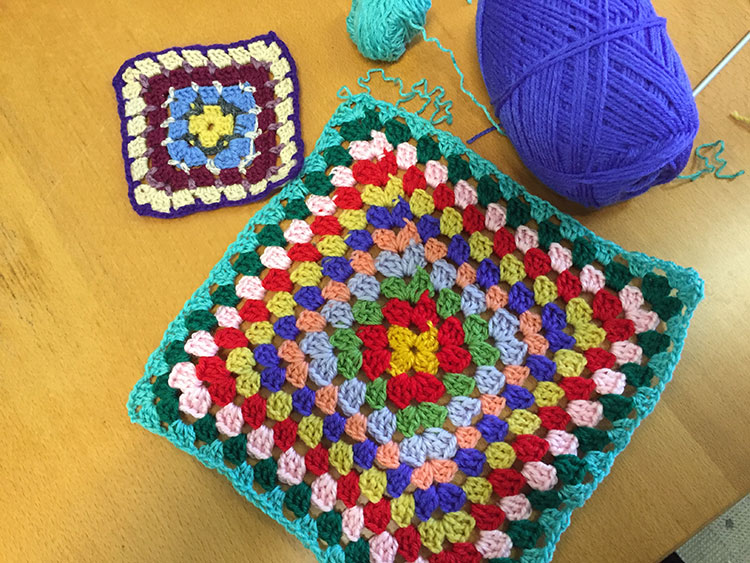
To start: 6 Ch in light colour, join into a ring with a sl st.
Round 1 : light; 2 ch, 2 tr 3 ch, * 3 tr, 3 ch into ring, repeat from * twice, sl st to first 2 ch.
Round 2 : Dark; sl st to first sp (2 ch, 2 tr, 3 ch, 3 tr) into first 3 ch sp,* (1 ch, 3 tr, 3 ch, 3 tr) into next 3 ch sp, repeat from * twice, join with a sl st.
Round 3 : Light; sl st to first sp (2 ch, 2 tr, 3 ch, 3 tr) into first 3 ch sp,* 1 ch, 3 tr into 1 ch sp (1 ch, 3 tr, 3 ch,3 tr) into each corner, repeat from * ending 1 ch, sl st to join.
Round 4 : Dark; sl st to first sp (2 ch, 2 tr, 3 ch, 3 tr) into first 3 ch sp,* 1 ch, 3 tr into each 1 ch sp (1 ch, 3 tr, 3 ch, 3 tr) into each corner, repeat from * , ending 1 ch, sl st to join.
Continue until square measures 10 inch square or 25 cm square..
Fasten off, leave a thread long enough to join squares with a tapestry needle when making up.
